This article is part 2 / 2 of using QT Jambi within Eclipse. Click here to read the first part of this article, “Getting started with QT Jambi on Linux”.
The present article you will learn how to design forms within eclipse and structure your QT code using the MVC pattern :
File > New > Other > Qt Jambi Project (Using Designer Form)
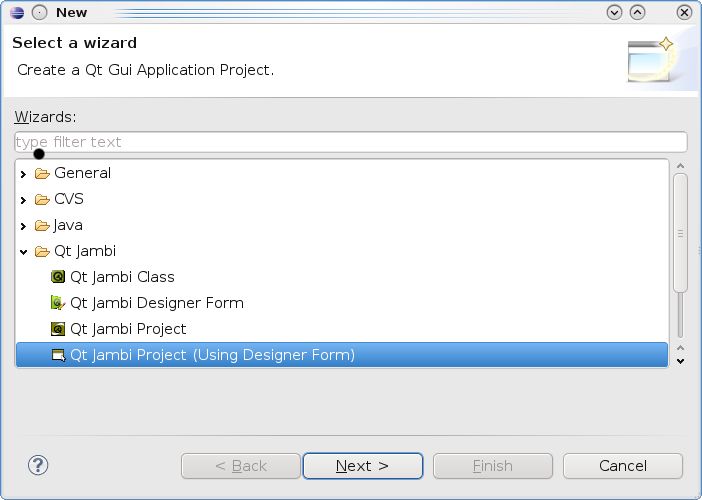
Name it JambiWeb
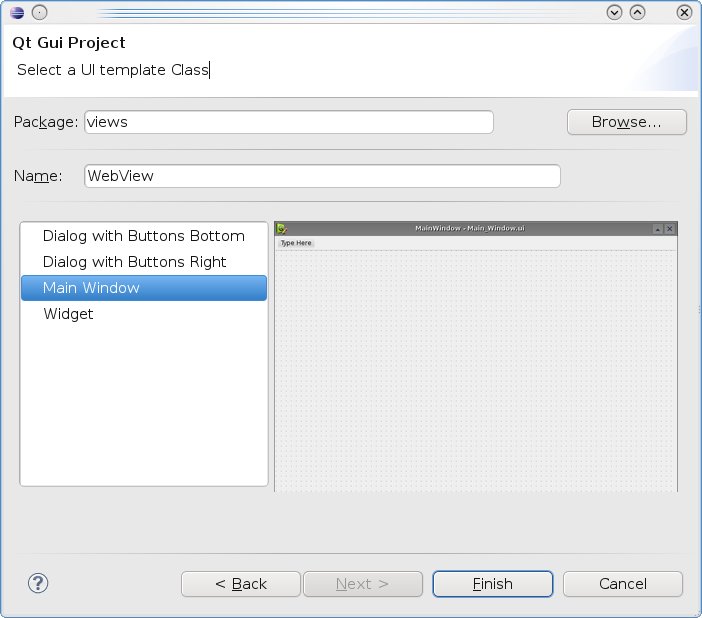
Add a new QT Jambi Designer Form and ajust settings like on screenshot.
This will create 3 files :
|File|Description| |–|–| |
src/views/WebView.jui| XML used by the Designer | |src/views/WebView.java| This is the view from the MVC concept, it displays the widgets contained inUi_WebView.java| |src/ui/views/Ui_WebView.java| Java file generated from the XML (you should not edit this file because it will be automatically replaced when you make changes to the form in the Designer). This file is more like a container for the widgets in the form, it does not displays the elements. |Now in order to respect the MVC pattern, the view should not display itself, but rather we should have a controller to trigger the display of the view. Add WebController class in the controllers package and insert this code :
package controllers;

import views.WebView;
import com.trolltech.qt.gui.QApplication;

public class WebController {
private WebView webView;

private Ui_WebView ui() { return webView.ui(); }

public static void main(String[] args) {
new WebController(args);
}

public WebController(String[] args) {
QApplication.initialize(args);

webView = new WebView(null);
webView.show();

initEvents();

QApplication.exec();
}

private void initEvents() {
}
}
Now delete the main() method in
views/WebView.java, and the contents should be as follow:package views; import com.trolltech.qt.gui.*; public class WebView extends QMainWindow { private Ui_WebView ui = new Ui_WebView(); public Ui_WebView ui() { return this.ui; } public WebView(QWidget parent) { super(parent); ui.setupUi(this); setWindowTitle("A custom browser for your application"); } }Next let’s design our interface
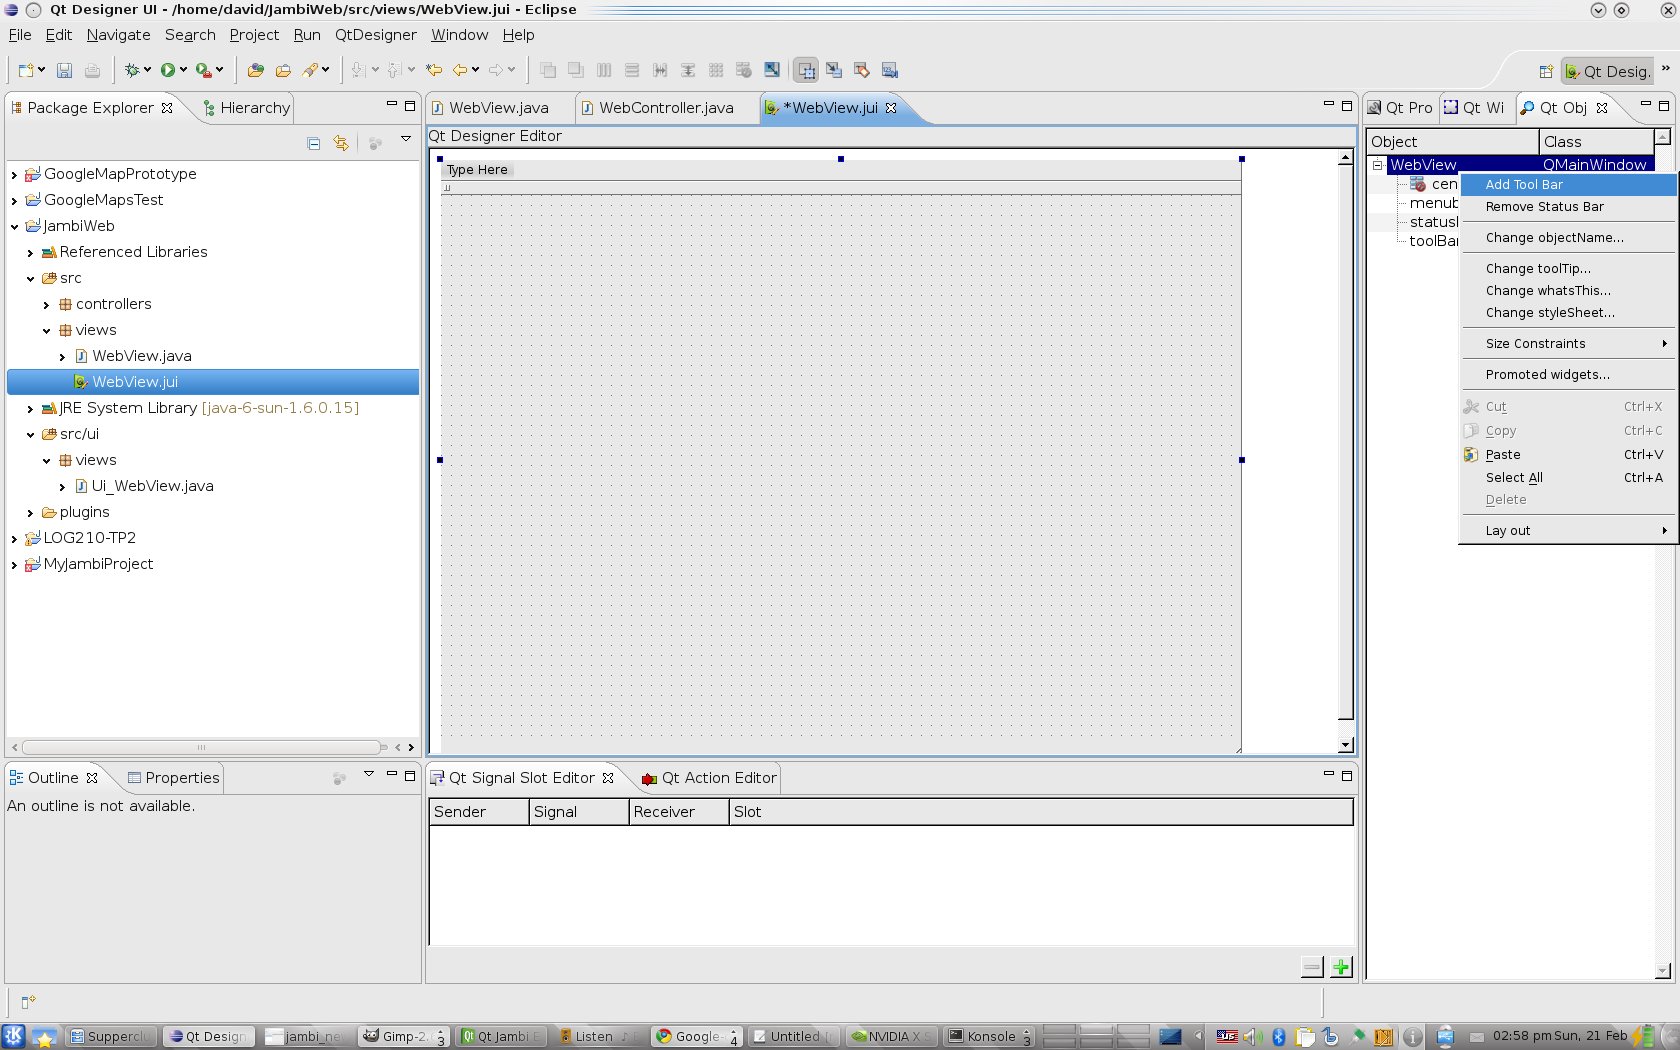
Open on views/WebView.jui and choose the “QT Designer UI Perspective”. This perspective should bring you a 3-tabbed panel on the right side of Eclipse view.
So choose “QT Object Inspector” tab and right click on your QMainWindow item and choose “add toolbar”.
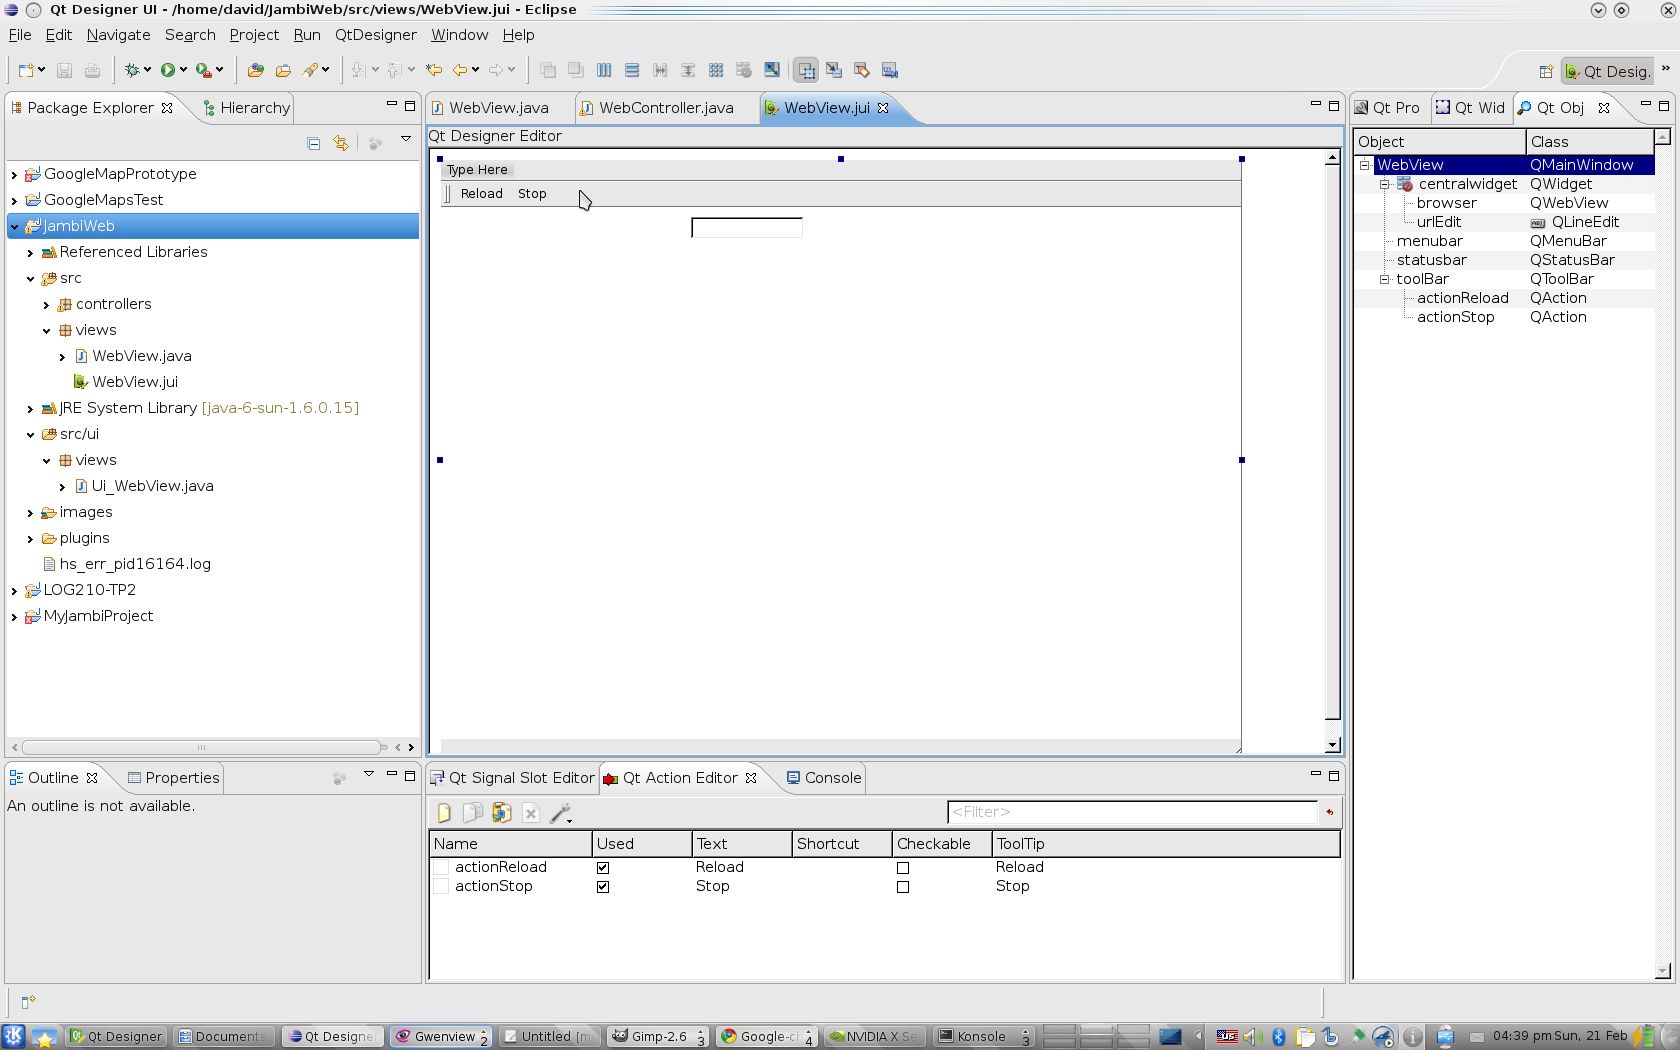
At the bottom of the screen, choose the “QT Action Editor” tab, and 2 actions (Reload, Stop), and drag & drop them unto the toolbar you are designing.
Next choose “QT Widget Box” tab.
Add a QWebView widget and name it “browser” (using QT Object Inspector tab)
Add a QLineEdit widget anywhere in the window – we’ll add it to the toolbar manually.
Your view should be looking like this :
Save
WebView.juiand go back to the Java perspective to add these lines toviews/WebView.java:public WebView(QWidget parent) { // ... ui.toolBar.addWidget( ui.urlEdit ); ui.toolBar.setFloatable(false); ui.toolBar.setMovable(false); } public Signal0 closed = new Signal0(); @Override protected void closeEvent(QCloseEvent event) { this.closed.emit(); }And let’s add code to handle the events in
controllers/WebController.java:private void initEvents() { ui().actionReload.triggered.connect(this, "onReloadClicked()"); ui().actionStop.triggered.connect(this, "onStopClicked()"); ui().urlEdit.returnPressed.connect(this, "onUrlEditReturnPressed()"); ui().browser.loadStarted.connect(this, "onLoadStarted()"); ui().browser.loadProgress.connect(this, "onLoadProgress(int)"); ui().browser.loadFinished.connect(this, "onLoadDone()"); ui().browser.urlChanged.connect(this, "onUrlChanged(QUrl)"); webView.closed.connect(this, "onClosed()"); } private void openURL() { String text = ui().urlEdit.text(); if (text.indexOf("://") < 0) text = "http://" + text; ui().browser.load(new QUrl(text)); } private void onReloadClicked() { ui().browser.reload(); } private void onStopClicked() { ui().browser.stop(); } private void onUrlEditReturnPressed() { openURL(); } private void onUrlChanged(QUrl url) { ui().urlEdit.setText(url.toString()); } private void onLoadStarted() { ui().statusbar.showMessage("Starting to load: " + ui().urlEdit.text()); } private void onLoadDone() { ui().statusbar.showMessage("Loading done..."); } private void onLoadProgress(int x) { ui().statusbar.showMessage("Loading: " + x + " %"); } private void onClosed() { ui().browser.loadProgress.disconnect(this); ui().browser.loadFinished.disconnect(this); }In the code above you have an exemple of a custom signal (QT’s observer/observable pattern). Here is how it works : when
QMainWindow::closeEvent()is triggered by QT when the user closes the app, we then delegates the information to the WebController via the signalWebView::closed. For more details refer to QT Jambi article on signals & slots.
But wait a minute! Cool application use icons not text in the toolbar! Yes you can!
- Download these two images (
 ,
,  ) and save them in a directory named “images” in your eclipse project.
 - Next add your images directory in your classpath: Project > Properties > Java Build Path > Librairies > Add Class Folder = “images”
Add set the icon manually in views/WebView.java :
Read on the QT Resource system to understand how this works.
Here you go! I hope this article will be usefull to someone!
Source code
final source code for this application